LSG Installation Instructions
For Loose Gravel Top Installation
1) Lay out job prior to excavation.
2) Remove all vegetation, debris or pavement.
3) Excavate soil to appropriate depth (see chart below)
4) Prep subgrade. Use gravel to level any areas if desired.
6) Lay out stakes.
- Four j-hooks should be placed at each corner of expanded grid dimensions.
- You should have one j-hook in each corner.
For more detailed explanation of how to properly measure and place the corner stakes, click here.
NOTE: Grid can be cut with any cutting tool to any shape or size as needed to fit the job site.
7) Unpack Grid.
- Remove bands with any cutting tool.
- Unfold the Grid.
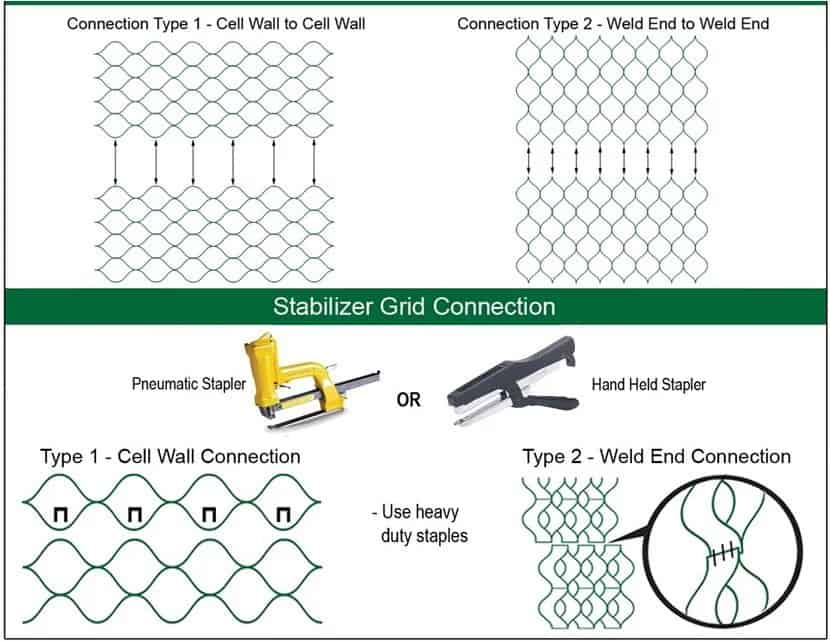
NOTE: If using more than one piece of Grid refer to connection instructions below.
8) Expand Load Support Grid.
- Start by attaching the 4 corner cells to the 4 j-hooks.
- Then, place a j-hook at the halfway point on each of the long sides and attach grid to those j-hooks.
- Continue adding more j-hooks and expanding open the grid until the long sides and then the short sides are fully expanded.
For a more detailed explanation of expansion, click here.
9) Continue to add j-hooks or simply fill gravel in perimeter cells as needed to ensure proper expansion.
10) Install rebar j-hooks every 4′ – 5′ throughout the system to keep the grid pinned down.
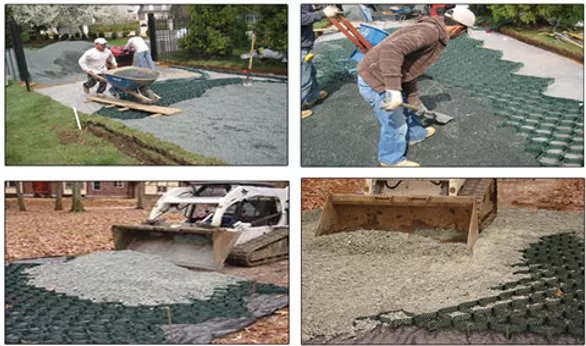
11) Begin filling cells with infill (see chart below for specified material).
- To prevent damage to the Grid, limit the drop height of infill to no more than 3 ft.
12) Machine infill.
- It is safe to drive on cells that have been completely filled.
CAUTION: DO NOT TWIST MACHINE TRACKS ON GRID.
13) Rake or blade compact the infill to specified dimensions over top of cells (see chart below for dimensions).
14) Compact infill with a plate compactor or plate tamper.
COMPLETED: Gravel-Tek installation.


